Kitekahunas - Learn Wave Kitesurfing: Lesson 10
How to gybe: Basic gybe
This course will help you to learn and master wave kitesurfing fast. An intermediate freeride kitesurfer is as little as 10 days practice away from being a wave kitesurfer! With these tutorial wave kitesurfing videos ...
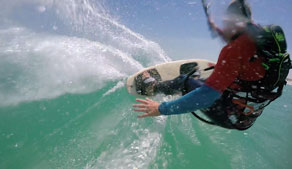
![]() ... You will learn much faster and then enjoy wave kitesurfing much sooner.
... You will learn much faster and then enjoy wave kitesurfing much sooner.
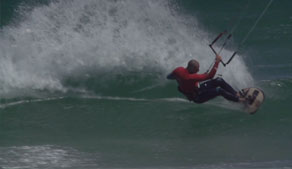
![]() ... You will not learn the wrong movements, which are later very difficult to correct and un-learn.
... You will not learn the wrong movements, which are later very difficult to correct and un-learn.
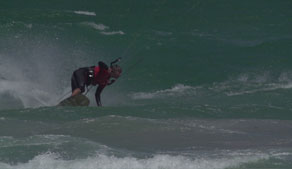
![]() ... Importantly, with the right posture you will look much more stylish on the water.
... Importantly, with the right posture you will look much more stylish on the water.
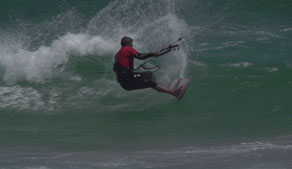
![]() ... People will admire you.
... People will admire you.
KITEKAHUNAS - Learn Wave Kitesurfing. A video course from Kitekahunas on Vimeo.
Only for private use. If you want to use it commercially, e.g. in your kitesurfing school, please book it from us >>
In Lesson 2 you have learned the carving transition to change direction with your directional wave board. After this maneuver, if you went heel-side into the carving turn, you will come out of it in switch, and vice versa.
As long as you are wave kitesurfing on a downwinder, you can easily ride in switch, or toe-side, because you don't really have to ride upwind. The few times you want to change from your strong side to your weak side, for instance because your back leg is becoming tired, or because you want to practice both your weak and your strong side as shown in Lesson 3, you can simply stop and fall back into the water and change your board around by hand.
If you can't go on a downwinder, but want to stay at one wave spot, you will have to ride upwind often. During the most enjoyable maneuvers in the waves you will travel fast downwind. So if you are not on a downwinder, you have to ride a considerable distance back upwind, and only then can you enter the waves again.
At a wave spot, you can effectively ride hard upwind, either by riding toe-side after a turn, or by changing your feet and riding your board in heel-side stance, which is the subject this lesson will cover.
When you turn, you need to ride a swift gybe maneuver and change your feet on the board. You have to perform the gybe quickly, otherwise you travel too far downwind during the gybe maneuver, which would defeat your purpose of going upwind. At the latest when you want to enjoy wave kitesurfing at a wave spot, as opposed to a wave downwinder, you will have an advantage if you are able to gybe.
Learning to gybe with changing your feet is not easy and takes a long time.
You should not make the gybe maneuver your main topic in the beginning of your wave kitesurfing development, but rather enjoy the pleasure of wave kitesurfing on a downwinder first.
You will mostly ride on your strong side, but also change over to your weak side every once in a while, because your back leg takes more strain when wave kitesurfing than your front leg and it will get tired faster.
But in time you will develop the desire to learn to gybe.
So now, as you have already discovered the great joy of wave kitesurfing, it is time to crack this tough nut, and learn the gybe with changing your feet.
It is best you train your gybes first on flat water. Therefore simply make use of your local spot to train your gybes.
Try not to get frustrated with yourself, when you cannot complete the maneuver and you fall into the water. It's normal. It will happen often and you will hardly succeed with more than 1 out of 10 gybes in the beginning. But you will learn, and slowly progress while practicing. And then, at some stage, it is wise to invest one day of training only the gybe on flat water. And afterwards you will get it right with 5 to 6 or more gybes out of 10.
This lesson 10 teaches you the basic gybe, the standard gybe maneuver, how it is explained in the textbook.
However if you ask 10 experienced wave riders, how they gybe, you will learn 10 different techniques. So there is not a right or wrong, but simply many different ways to change your feet while gybing.
Lesson 11 will explain to you an advanced method of gybing, in particular how you can gybe most effectively when riding strapless.
So here is the standard way of gybing. It is also the most common way when you are wave riding with foot straps. The maneuver consists of a number of steps. We'll first give you an overview and then a detailed step-by-step instruction how to perform the maneuver.
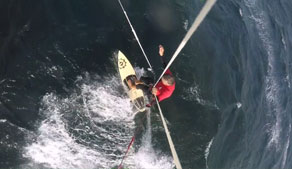
The rider initiates the maneuver by flying the kite higher in the wind window. The rider takes both feet out of the foot straps, then flies the kite into the other side of the wind window, and starts the turn. Then place your back foot next to your front foot. Once you have almost completed the turn, bring your new back foot backwards and then put your feet back into the foot straps.
This, in short, is the basic gybe maneuver.
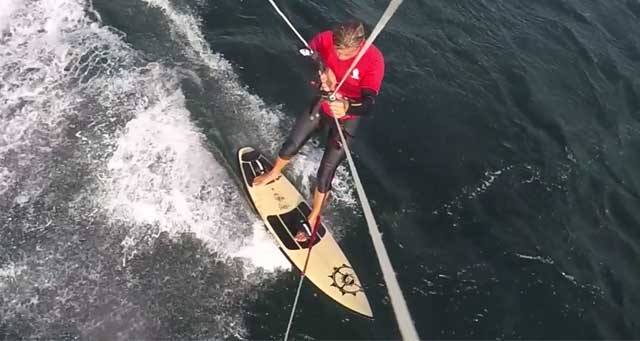
Let's have a look at everything in more detail.
Step 1:
Fly your kite slightly higher in the wind window, to slow down, and to gain more balance and stability on your board, because you can now use the lift of your kite to balance. If you go to the left, fly your kite to 11 o'clock. If you go to the right, fly it up to 1 o'clock. You want to go at around 90 degree angle towards the wind.
Step 2:
Loosen your back foot in the strap, and take your foot out of the strap, and place it just before the strap.
It is better to have your foot just in front of the strap, so later, when you change your feet, the distance to the new position, where you want to place your foot, is minimal.
Step 3:
Then loosen your front foot in the foot strap and take it out of the strap, a little bit. Just enough, so that your new front foot will find enough space to get loosely into the foot strap and your old foot is not in its way.
Step 4:
You start the gybing maneuver and turn the nose of your board slowly downwind, while flying your kite from 11 o'clock across the wind window to 1 o'clock, either up over 12 o'clock or directly. While doing this, the tail of your board turns through the wind.
Step 5:
At this moment, quickly place your back foot next to the front foot-strap. Both your feet are now next to each other, forming a 90-degree angle and both your big toes may touch or almost touch each other.
It is absolutely crucial that you place your new front foot exactly at the right position in a quick movement. It helps that you look down, so that you step your foot exactly at the right place.
While bringing your back foot forward, you may pull the bar slightly but sharply, so that your kite gives you some lift for a brief moment and absorbs the gravity from your body. Your body becomes lighter and this will help you to balance on your board.
You are now going downwind, with both your feet next to each other, pointing towards each other. If you slightly bend your knees, you will gain stability and it helps with balancing.
Step 6:
You turn your board further and you are now already riding into the new direction, still going somewhat downwind. Quickly place your new back foot backwards, just in front of the back foot-strap.
Then slip your front foot into the front-foot strap.
Your kite is still high, while doing this, and you can now steer your board further upwind to remain slow, because you don't want too much speed for the next step.
Step 7:
The gybe is almost finished. Now you only have to get your back foot back into the foot strap. This can be quite tricky, because the spray of your board can grab your back foot and throw it backwards with great force. To avoid this, turn your foot so that your toes point backwards and your heel forward into the direction you are riding. With this you optimize the spray's angle of attack and you can safely slip your foot into the foot strap.
COMMON MISTAKES
The most difficult portion of the maneuver is when you place your new front foot quickly forward, next to the foot strap. If you don’t place your new front foot at the right position, your board can tilt and you will fall. Therefore it is absolutely essential that you look down and learn to place your foot fast, at exactly the right position.
When you have placed your new front foot into this position, next to the front foot strap, going downwind, you may at first find this body posture rather unusual and you may struggle with balance.
If you do, practice this body posture simply by riding downwind for a while.
Very soon you will find it rather easy to control your board in this posture.
Also try the gybe and changing of feet when riding strapless. It is easier. The number of steps you have to perform during the maneuver reduces, because you don't have to take your feet out of the foot straps and back in.
Apart from this, the maneuver stays the same. When you start the maneuver, fly your kite up and start going downwind.
Move your back foot a bit forward, to shorten the distance for the quick movement to the front, which you'll have to do in a moment.
Bring your front foot a bit backwards. Start the turn and ride further downwind, fly your kite over to the other side of the wind window, but keep it high.
When the tail of your board goes through the wind, quickly place your new front foot next to your old front foot, with your feet pointing towards each other and with your knees slightly bent.
Bring the other foot backwards.
You can now fly your kite down to pick up speed, and you may slightly correct your feet to be 100% comfortable.
Congratulations. You have just completed your first perfect gybe maneuver.
SUMMARY
- Gybing becomes only really important when you have to ride upwind a lot during your wave kitesurfing sessions. Therefore, if you are on a downwinder, you don't need to be able to gybe and you can still enjoy wave kitesurfing. However, it helps to learn to gybe before successfully riding at a wave spot.
- You may practice your gybes first at your home spot on flat water.
- Learn the steps of your gybe and practice it with straps and strapless.
- Placing your new front foot quickly at exactly the right position is crucial for the success of the gybe maneuver.
Watch the other wave kitesurfing Video Lessons
Lesson 2: How to start wave kitesurfing - turns with the right timing FREE
Lesson 3: Your furst turns with distancing and usage of the entire wind window FREE
Lesson 4: Surfing a wave - backside riding and turns on a wave
Lesson 5: Frontside top-turn
Lesson 6: Frontside top-turn after bottom-turn
Lesson 7: Focus on frontside bottom-turn FREE
Lesson 8: Focus on frontside top-turn FREE
Lesson 9: Backside top-turn after bottom-turn
Lesson 10: How to gybe - basic gybe/jibe FREE
Lesson 11: How to gybe - advanced gybe/jibe

Wave Kitesurfing Video Lessons

Download all videos onto your harddrive or smartphone and view them conveniently during your holidays or on the beach, without the need for an internet connection, for only $4.99, and also get the newest wave kitesurfing videos for lifetime: only $199.95


